5 STEPS TO CREATING A MODERN ORLY FRENCH MANICURE
Introducing our first guest blog with ORLY super fan Daniella, also known as @maniwithdanne on Instagram.
Let’s get to know Daniella
So about me, I'm Daniella 24 years old originally from Brazil. I like football, carnival, and our tropical colours. Nails have always been a big element for us, since I was young, I always found a way to express myself through my nails. About a year ago I decided to be more creative and try a few nails trends, and that was how the passion started. After realising how fun and expressive it was, I started to look for inspiration everywhere and I was able to find them in the smallest things like a vase, clothes, even the moody weather inspired me.
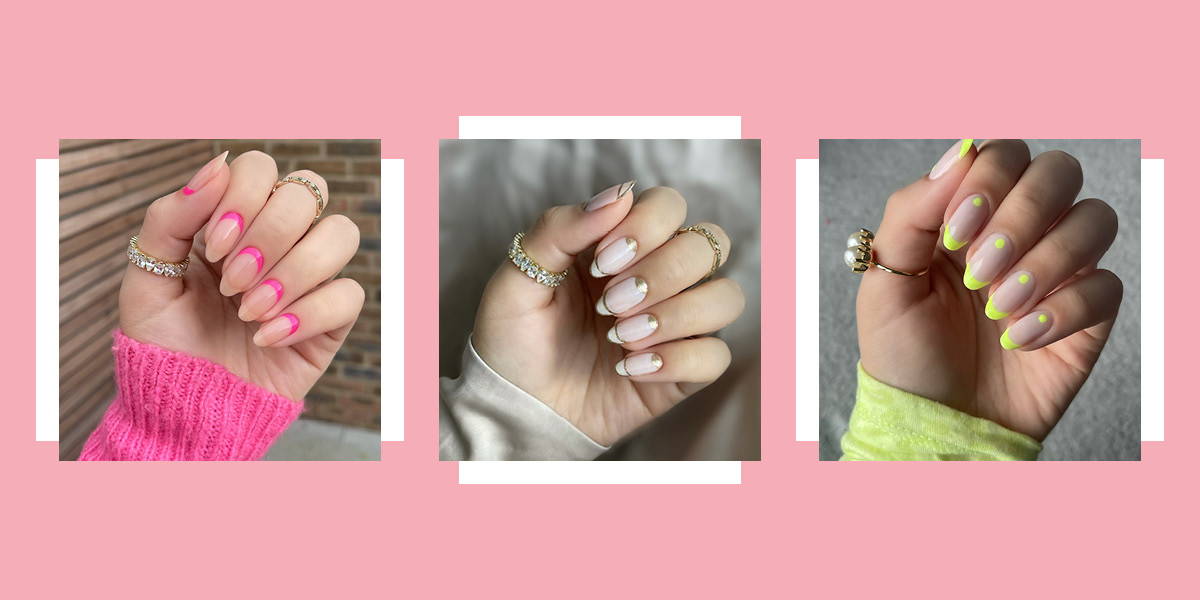
Learn how to re-create one of Daniella’s takes on a modern ORLY French manicure in just 5 steps below:
Step 1: Preparing the nails
1. Firstly remove any remaining nail polish left on the nail plate with ORLY Genius Remover enriched with peach, white tea extract, and eucalyptus oil using a cotton pad to remover old nail polish without stripping away moisture.
2. Gently file over the nail using an ORLY nail file. Regularly filing your nails helps promote nails growth.
3. Then apply ORLY Cutique Cuticle Remover to the cuticle area and spread it over the nails to help remove any stains from the natural nails. After 60 seconds start gently pushing the cuticles back with the ORLY Cuticle Pusher and Remover ensuring nails and cuticles are tidy. Then use a cotton pad to clean off the remaining product.
4. Now cleanse your skin and nails before applying nail polish – grease, oils and product on the nails can prevent the nail polish from bonding to the nail which will cause nail polish to peel. To finish off your nail preparation wash your hands to get rid of any residue or oils your nails may have.
Step 2: Nail Polish basecoat
To have a long-lasting manicure the key is to prep the nail and use a nail polish basecoat. A nail polish basecoat should be applied regardless of the design you’re creating. Daniella’s favourite treatment and nail basecoat is ORLY Nail Defense treatment. “I apply one thin layer to each nail and wait about 2 minutes to make sure it is dry.” ORLY Nail Defense prevents your nails from peeling and bonds those nail layers together whilst protecting and sealing them with our ORLY Nail Defense protein enriched strengthening nail base coat.
Step 3: Creating nail art designs
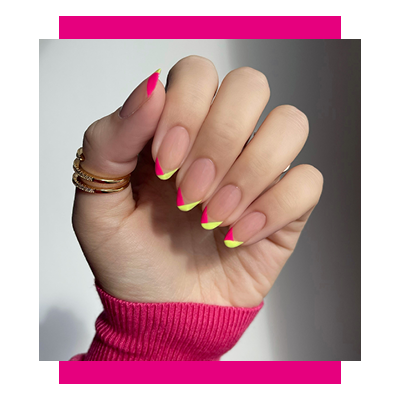
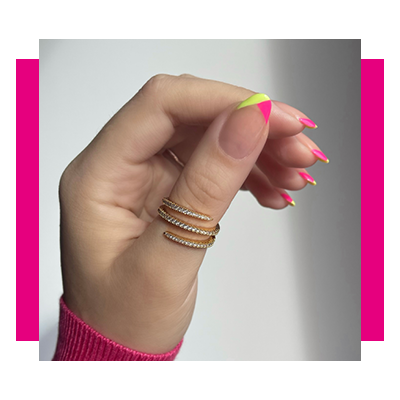
1. When your nail art design has a negative space nude base coat such as the coloured French tip Danielle uses ORLY Breathable Nourishing Nude nail polish, applying 2 thin layers of nail polish and waiting about 3 minutes between nail polish layers to make sure it is nice and dry.
2. Once your base nail polish is dry move onto the tip, Daniella used ORLY Glowstick nail polish. Using the ORLY 600-bristle Genius Brush going from the middle of the nail to the corner with one stroke. Repeat this step on each of your nails.
3. Then apply one stroke of the ORLY Beach Cruiser nail polish, this time from the corner of the nail to the middle. Daniella’s top tip: “I allow the Beach Cruiser nail polish to overlap with my previous Glowstick stroke to create a 2 coloured V shape French manicure.
Step 4: Locking in the nail art design
1. Use a thin tipped clean up brush to clean up any little mistakes.
2. Once the design is dry use a nail polish Topcoat. ORLY Polishield Topcoat is a 3-in-1 quick-drying nail polish topcoat, high shine and chip resistant that contains UV filters to prevent nail colour from fading, perfect for those bright and bold nail art designs as well as a longer-lasting, high shine manicure.
Step 5: Hydrating your skin and nails
The grand finale of your manicure; hand and nail care! Daniella recommends using our ORLY Argan Oil Hand Cream and ORLY Argan Cuticle Oil at the end of your manicures to make sure your hands and nails are moisturised; moisture is key and will help promote nail growth and improve the appearance of dry cuticles too.