Easy Halloween Nail Art in 5 Steps
With Halloween fast approaching it’s only right to celebrate by adding a terrifying touch to your Halloween nails.
Pick your Halloween nail design
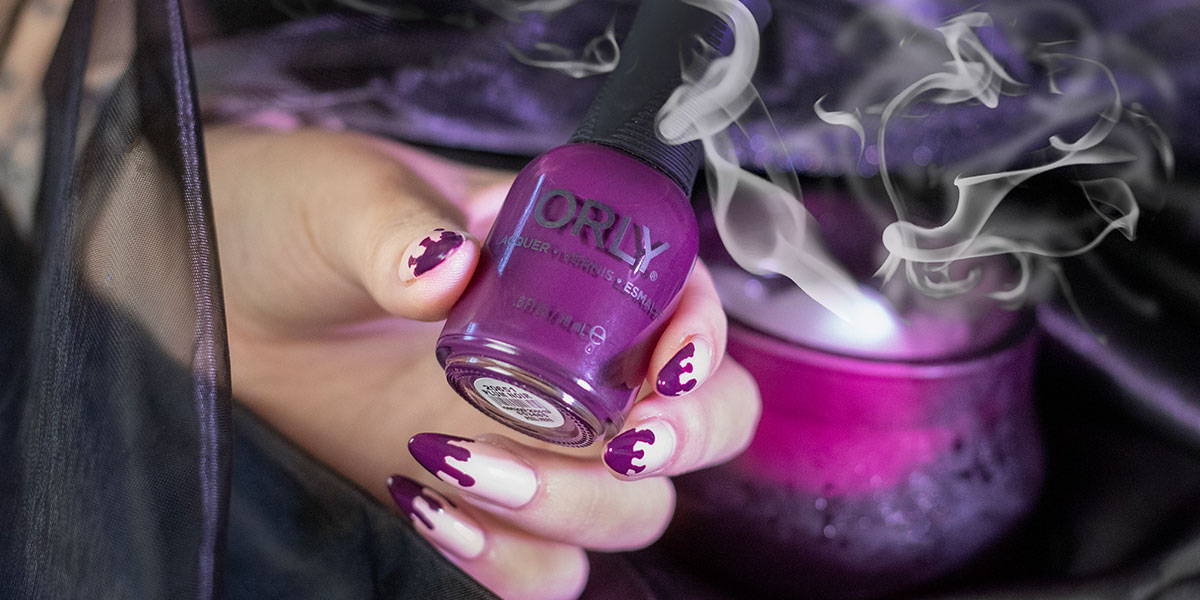
Halloween is the perfect time to get creative with your manicure, but if you’re in doubt of which Halloween themed nails you should choose - bloody nails are the way to go. A blood dripping manicure is the simple most effective Halloween nail art choice!
Our ORLY ambassador Lou Stokes is here to share her top tips on how to create a blood drip manicure.


Step 1: Prep for your spooky nail design
If you want your Halloween nails to last throughout Halloween celebrations then preparation is key.
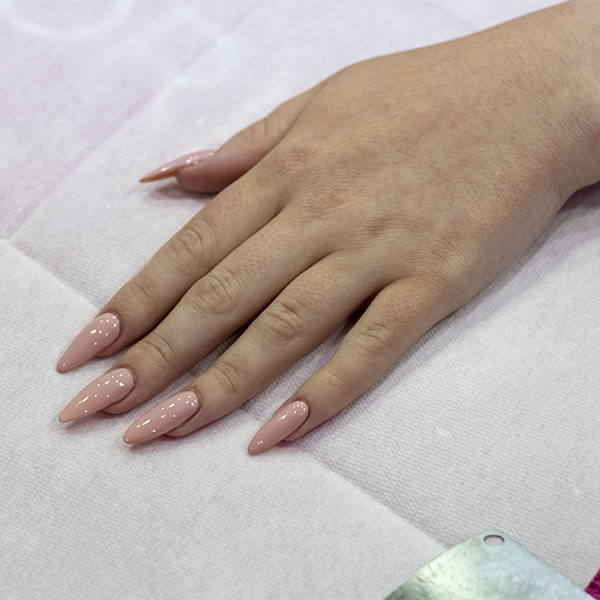
• It’s time to get filing those nails! Coffin shaped Halloween nails or short almond nails? File your nails into your desired nail shape and buff over the nail plate lightly.
Top tip: avoid a see-sawing motion when you’re filing your nails. Filing in one direction helps prevent your nails from peeling, weakening, and breaking of the nails free edge.
• Cuticle care - apply ORLY Cutique to the cuticle areas and brush down the nail plate and leave it for 60 seconds. ORLY Cutique will softens cuticles and lifts off any dirt or debris from the nail plate. Once you have applied ORLY Cutique push back your cuticles using your ORLY Pro Pusher.
• Apply one coat of ORLY Bonder Basecoat to every nail as this will prevent nails from chipping. ORLY Bonder Basecoat will also grip the nail polish to the nail for a long-lasting manicure.
Step 2: Apply your Halloween nail art base polish
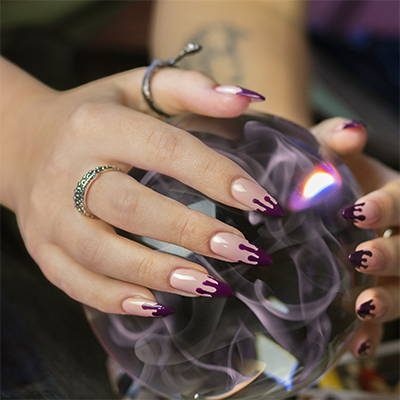
It is up to you which base nail polish you choose for your Halloween nails, but we suggest picking a colour that will really contrast with the drips for a maximum SPOOKY impact. We recommend using a nude base nail polish like ORLY Breathable Sheer Luck nail polish.
Once you’ve chosen your Halloween nail colour, apply two coats of the nail polish making sure you wait a minute or two for the nail varnish to dry in between coats.
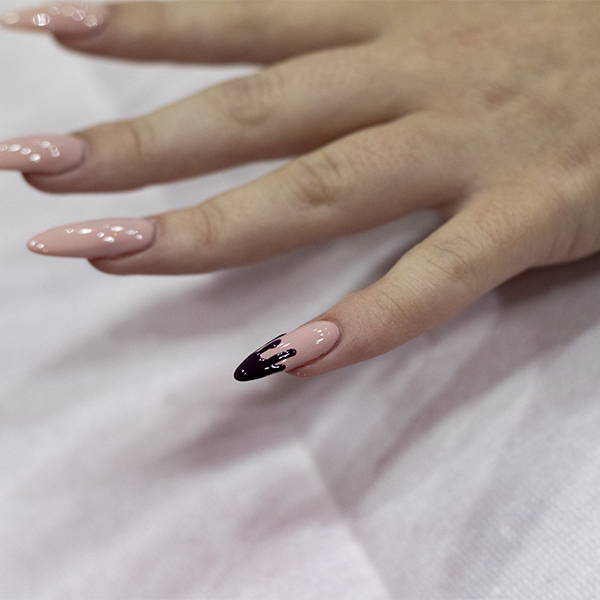
Step 3: Add the Blood Drips to your Halloween nails
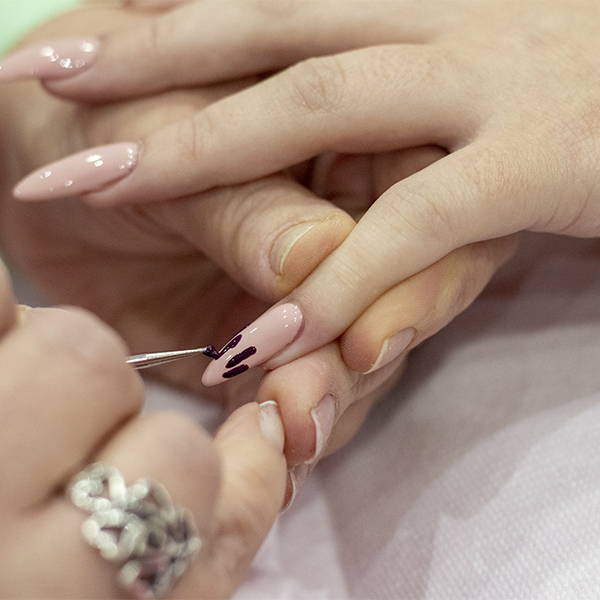
• Pick your favourite blood curdling spooky Halloween nail colours for the blood drops whether it be blood red nail polish, goth black polish or mystical purple polish. We have used ORLY Plum Noir nail polish for a mystical Halloween nail.
• Using a dotter tool (or if you don’t have one the end of a hairpin, or circular end of a match) apply drops of nail polish to the nail plate at varying heights and pull down to the free edge of the nail. Don’t worry if it’s not symmetrical or perfectly straight, natural movement will add a realistic effect.
Step 4: Complete the Nail Art Design
To finish your Halloween nail design simply use the brush from your chosen blood shade nail polish to go around the free edge of the nail. This will join the blood drips and add an authentic and spooky touch to this rather creepy look, it is Halloween – you can never have too much blood!

Step 5: Apply A Topcoat
To complete your Halloween nail art and ensure your manicure stays chip free, flawless, and glossy for as long as possible, add one coat of ORLY Polishield Topcoat to every nail.
Top Tip: Wait 5-10 minutes before applying your topcoat as you don’t want to smudge your nail art.
Recreate this easy Halloween nail art at home with our limited edition ORLY Deliciously Dark collection.
Nail art by Jessica Marks.